
Mixing Up My Stands & Strands!
I’ve been considering my stitching set up after seeing an influx of posts on stands and frames in the Facebook groups. I’ve always balanced my q-snap frame between the bench and chair in order to be able to stitch using the two-handed method.
My stitching set up: (featuring with my two goldfish Flounder and Finn, swimming around in the shadows!):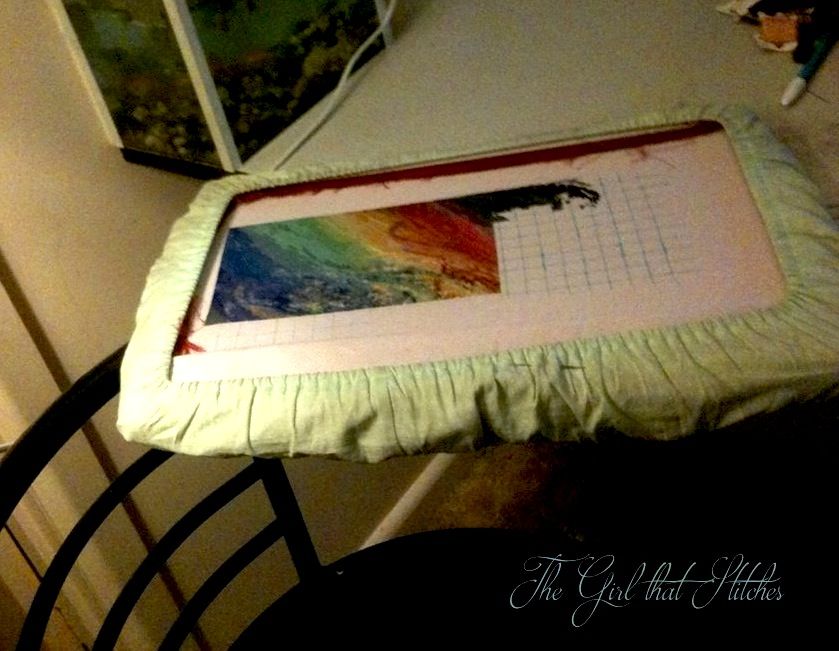
After seeing all these posts on stands, I started to wonder whether a needlework stand would make life easier by giving me more options... (You guys are going to have a laugh at me on this and I can’t believe I didn’t think of it sooner!) I’m a musician and into audio stuff, so naturally there are a few microphone stands lying around the place. It all of a sudden occurred to me that a mic stand would also work perfectly as a needlework stand! In fact the q-snap is just the right width to snap into the microphone clip!
Check it out:

So far it’s working great! I can easily adjust the height of the stitching and the angle of the boom arm! The only downside is that it’s not very ergonomic having to turn the whole frame around when I need to access the back of the stitching. Still I’ve had over a week to work with the stand and I’ve found it great if I want to sit down on the sofa and stitch. Anyway I’m impressed that my mic stands can be so multifunctional!
From mixing up stands, to mixing up strands! The topic of using different amounts of strands has come up after I mentioned my plans for mixing my strand amounts in Robber Bridegroom. In case you missed it I intend to use 5 over 1 on black, 4 over 1 on darks colours, 3 over 1 on mid-tones and 2 over 1 on light tones. A major thing I’ve realized with tent stitching is different amounts of strands can be mixed in one project without it being noticeable. I’ve done this with Nocturne to a smaller degree by successfully combining 2 over 1 and 3 over 1. This works because the different floss colours/tones effect the way the thread is perceived once it’s stitched into the fabric. My point is that in the past I have stuck with a uniform amounts of threads for most pieces because for some reason I had this limitation in my mind about not mixing thread combinations… However, I have found tenting has required me to use different amount of strands in the one project to get optimum results. As a result of experimenting with these combinations I am much happier with the stitching! With Robber Bridegroom I'm working out strands amounts out on a colour by colour basis as I go along... I will post more details on the amounts of strands being used on each DMC shade once I'm a bit further along and have established exactly what I'm doing ;)
Previous progress on Robber Bridegroom (does anyone else see a duck in the "blobs?)":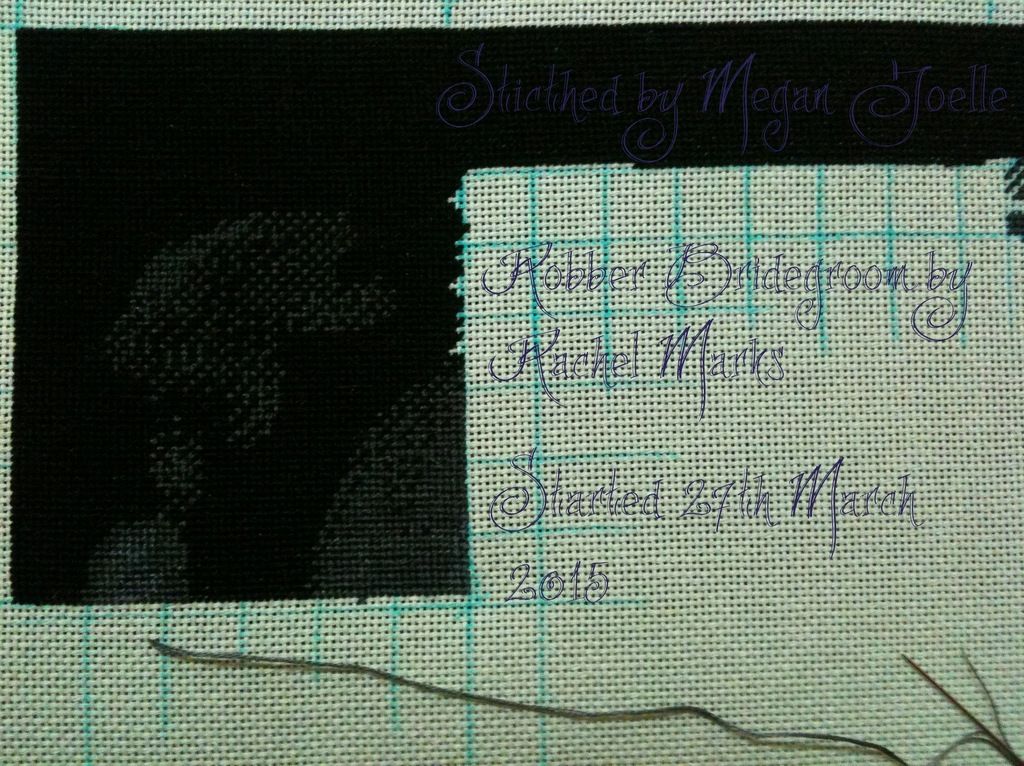 Current progress, page 2 finished:
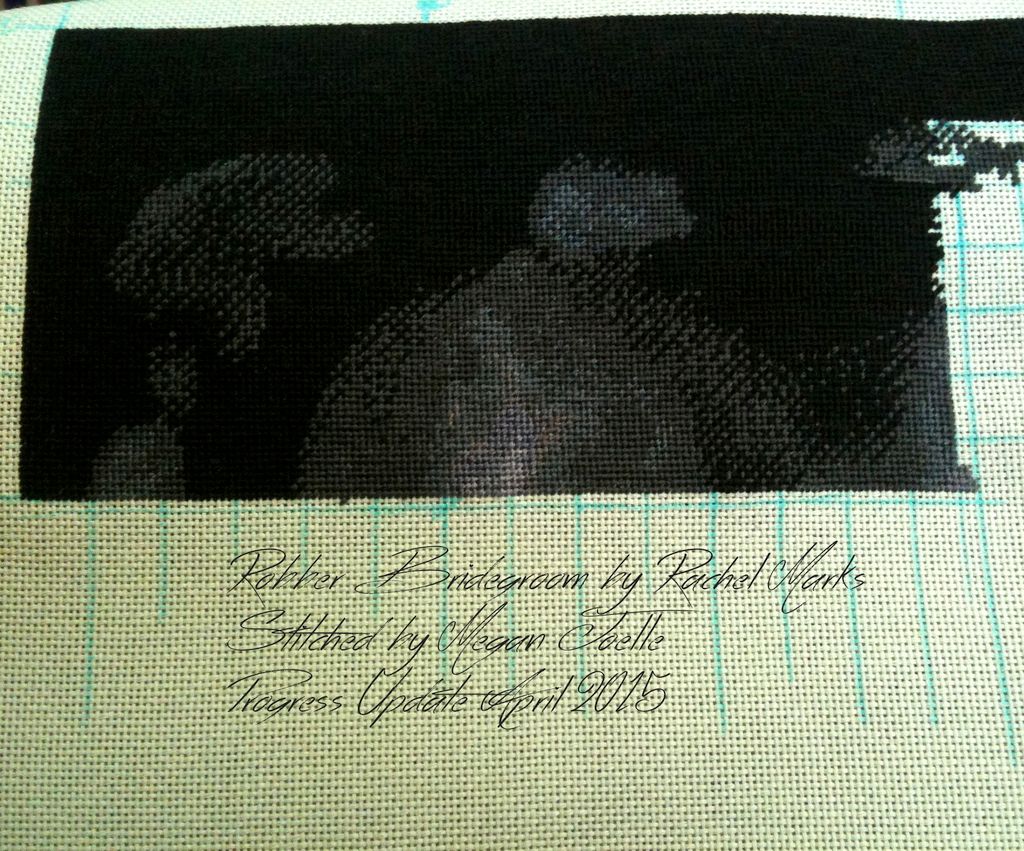
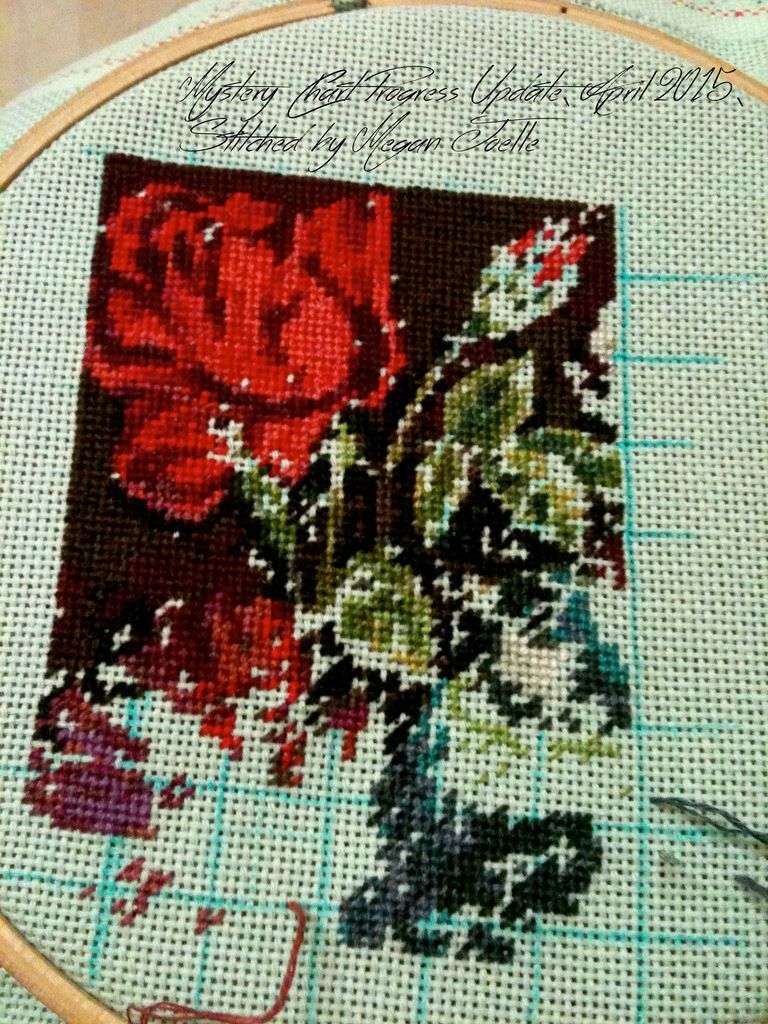
I’ve also had the mystery chart going on alongside all the black thread to keep some colour in the mix! This is definitely one of the most complex stitches I’ve ever attempted but I am enjoying the colours in this.
Previous progress:
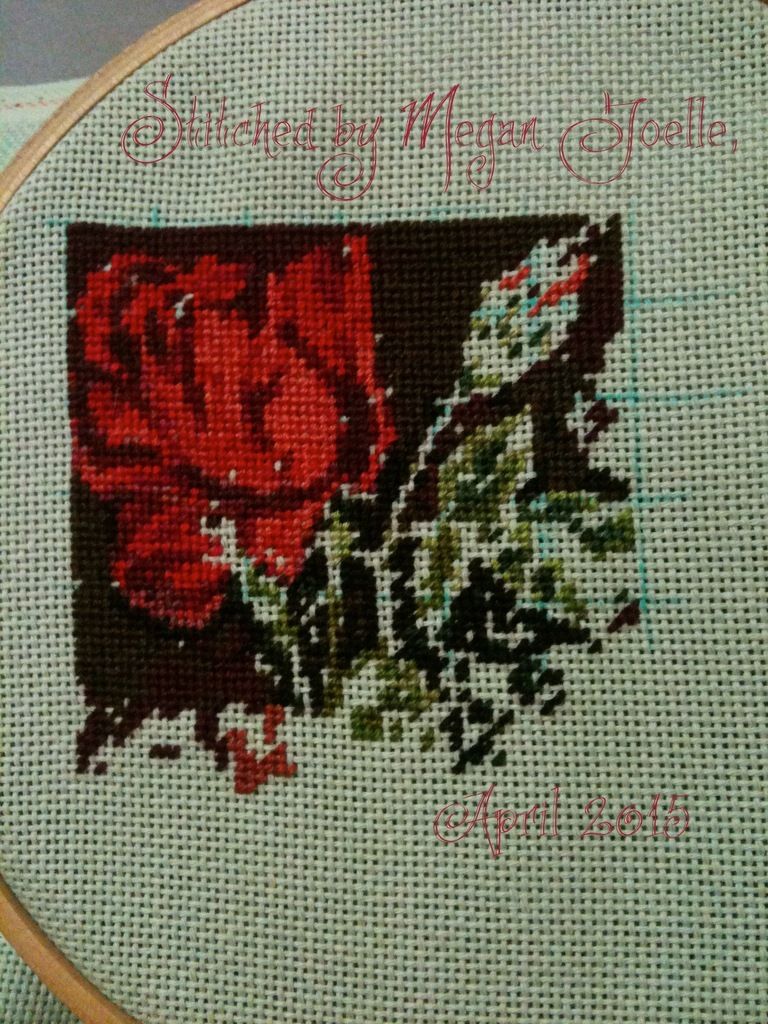
Current Progress:
My stitching set up: (featuring with my two goldfish Flounder and Finn, swimming around in the shadows!):

After seeing all these posts on stands, I started to wonder whether a needlework stand would make life easier by giving me more options... (You guys are going to have a laugh at me on this and I can’t believe I didn’t think of it sooner!) I’m a musician and into audio stuff, so naturally there are a few microphone stands lying around the place. It all of a sudden occurred to me that a mic stand would also work perfectly as a needlework stand! In fact the q-snap is just the right width to snap into the microphone clip!
Check it out:

So far it’s working great! I can easily adjust the height of the stitching and the angle of the boom arm! The only downside is that it’s not very ergonomic having to turn the whole frame around when I need to access the back of the stitching. Still I’ve had over a week to work with the stand and I’ve found it great if I want to sit down on the sofa and stitch. Anyway I’m impressed that my mic stands can be so multifunctional!
From mixing up stands, to mixing up strands! The topic of using different amounts of strands has come up after I mentioned my plans for mixing my strand amounts in Robber Bridegroom. In case you missed it I intend to use 5 over 1 on black, 4 over 1 on darks colours, 3 over 1 on mid-tones and 2 over 1 on light tones. A major thing I’ve realized with tent stitching is different amounts of strands can be mixed in one project without it being noticeable. I’ve done this with Nocturne to a smaller degree by successfully combining 2 over 1 and 3 over 1. This works because the different floss colours/tones effect the way the thread is perceived once it’s stitched into the fabric. My point is that in the past I have stuck with a uniform amounts of threads for most pieces because for some reason I had this limitation in my mind about not mixing thread combinations… However, I have found tenting has required me to use different amount of strands in the one project to get optimum results. As a result of experimenting with these combinations I am much happier with the stitching! With Robber Bridegroom I'm working out strands amounts out on a colour by colour basis as I go along... I will post more details on the amounts of strands being used on each DMC shade once I'm a bit further along and have established exactly what I'm doing ;)
Previous progress on Robber Bridegroom (does anyone else see a duck in the "blobs?)":
 Current progress, page 2 finished:

I’ve also had the mystery chart going on alongside all the black thread to keep some colour in the mix! This is definitely one of the most complex stitches I’ve ever attempted but I am enjoying the colours in this.
Previous progress:

Current Progress:

So until next time don’t be afraid to mix things up a bit! xx


Looking good! Great idea with the mic stand lol I don't think I would have thought of that
ReplyDeleteI love the mic stand idea. Your progress looks wonderful!
ReplyDeleteWhat a good idea for not having to spend lots of money on a stand. I hope it works out well for you. :)
ReplyDeleteThe mic stand is a great idea. I balance my q-naps on my right thigh as I raise it near my chest, so I can use the two-handed method.
ReplyDeleteWell using a mic stand for your stitching is definitely clever and cheaper!! If it works for you, use this system :) I don't use stand as I find them too annoying when you need to work on the back of the design.
ReplyDeleteI can see a duck too on the blog :) Great progress on both projects!
Glad I'm not the only one who sees the duck, lol!
DeleteGreat idea Megan!! the best is that works fine for you. Love all your Wip's :)
ReplyDeleteGreat ingenuity with the stand ... I just wish I had a mike stand nearby! Also good luck on finding the perfect combination of strands.
ReplyDeleteThanks! You can actually pick a mic stand up pretty cheap... You'd just need one with a boom arm and wide opening on the mic clip. There are some on ebay for about $20... You can also get tablet holders to attach to them, which is useful if you use a tablet for reading your patterns ;)
DeleteWhat a clever idea for a stand! Love all your progress!!
ReplyDeleteps...found a piece of fabric, bought some marking pencils - now I need to grid. Have never done this so I am a bit nervous but will try one day next week.
ooo!!! How exciting! Just make sure you test the pencil will wash out of the fabric you are gridding! Maybe test a bit on the border first ;) I've just heard some horror stories about certain types of pencils not washing out.
DeleteWhat a clever idea :) Robbers bridegroome is wonderful, so nice to see your progress!
ReplyDelete