Posts

Showing posts with the label Cross Stitch

Bluebell Dreams

Image
Butterfly Series Over the past couple of months I've been working on designing a series of Butterfly Cross Stitch Charts.  The current plan is to release one butterfly a month (at the very least) for the next year.  I will be sharing the designs here alongside my normal stitching and crafting activities.  The charts will be available as pdf downloads from my store " The Girl that Stitches ." January's butterfly is called " Bluebell Dreams Butterfly ." The design size is 131 stitches high by 181 stitches wide:  Preview of chart: Happy Stitching! xxx
Enchanted Stitching

Image
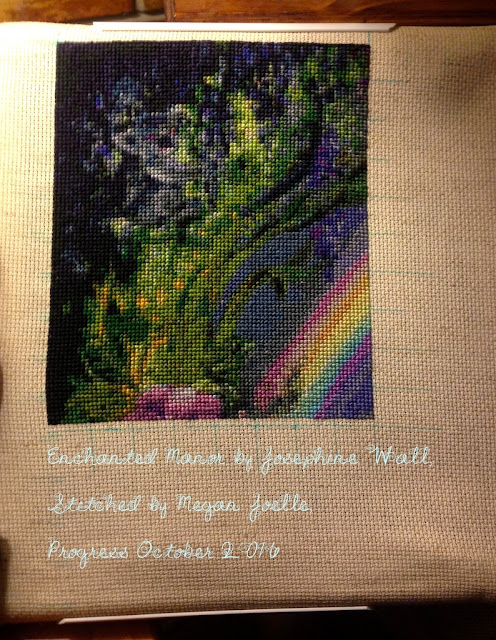
Enchanted Manor The past couple of weeks I've been working on page two of my Enchanted Manor Crop. Previous Progress: Current Progress: Iris I also stitched in all the parked threads leftover from the Challenge.  This is page 6 of Iris Keeper of the Rainbow: Previous Progress: Current Progress: Happy Stitching! xxx

Mr Greenwood's Stitching

Image
A Guest Stitcher! My neighbour Rob has recently retired and decided to take up cross stitching!   I've been helping him learn how to stitch over the past couple of months.  He is stitching the R.A.E.M.E Badge, which is an image close to his heart from his days spent in the Army. R.A.E.M.E Badge: Rob's Stitching Progress:  Stitched on 14 count Aida (full cross on the main image and tent stitch on the background): Rob's PVC Floor Stand Project After working with a hoop for several months, Rob has now switched to a Q-Snap frame and decided he would also like a floor stand.  So we made a floor stand out of pvc piping based on this tabletop stand (obviously with longer legs than the design specifies).  After assembling the stand it was spray painted to achieve a copper finish. Waiting for the paint to dry: To complete the whole set-up, we have "Bruce" the friendly frog...  Bruce does all the frogging so Rob doesn't need too lol! ;) ...

Water Lily Pond

Image
Butterflies Over the past couple of weeks I’ve been stitching another butterfly cushion! This was the colour scheme of the first one I stitched some time ago. Original Butterfly: Monet’s Room I stitched another version of this butterfly as a gift for my Sister. The colour design of the cushion was inspired by Monet's painting "Water Lily Pond 2." My Sister has a room with a Monet inspired colour scheme, so I picked colours that would work in this room. Water Lily Pond 2 by Monet: New Butterfly; Ready to be stitched to cushion: Finished Cushion; 22 count Hardanger tented with 3 to 4 strands: Lilly Butterfly The Pattern is available on the downloads page .  The colours used in this Monet version are: Happy Stitching! xxx

The Three Little Birds… Oops… I mean The Three Rather Large New Starts!

Image
The Three Little Birds is a Grimm Fairytale and there seems to be a fairytale theme going on at the moment with my newest chart acquisition. As previously mentioned Heather from Fantasy Cross Stitch gifted me with a chart. Thanks again Heather! At the same time she decided to purchase her first HAED, the gorgeous Rapunzel chart by Annya Kai. So we have both picked fairytale charts! The chart I choose was Robber Bridegroom by Rachel Marks. As a rule I don’t normally gravitate towards the monochromatic designs since I’m such a big fan of color! However, I broke the rules for this chart. It just really spoke to me. Chart Mock-up:   Link to chart Time to stock up on black LOL! There are 24 skiens of black needed for 25 count but I’ll need more than that on the 20 count. My current estimate based on what I’ve stitched so far is about 40 skiens! It’s not all that bleak though! There are actually 16 different colours in this chart. The charts I have been working ...

Easter Giveaway Announcement!

Image
Thank-you to everyone who participated in the Easter Giveaway!  I’ve enjoyed looking at the charts you all love, as well as visiting your blogs. I wanted to draw this on video so you could see it was done randomly. So here goes: Congratulations to the winner!  I will get the chart sent through as soon as possible but please be aware that we may be in different timezones so that may delay the process :) I hope you all have a wonderful Easter or holiday! Wishing you all many happy hours of stitching!

Hunting for Treasure...

Image
Treasure Hunt is such a confetti heavy pattern that it seems to be taking a long time to get not much done!  I admire anyone braving the whole chart!  Page number three of the cropped section is now finished and I'm just over halfway through page four.  There are ten pages all up. Previous progress: The project was not fitting on my q-snap frame well (I had to hold it with the longer length as the height, which just felt weird) so I went a hunting for my old scroll frame, which has been tucked away in the cupboard catching dust for some time!   All of my other projects are too big for this frame but Treasure Hunt fits on there nicely.  Now I'm back to stitching with the frame being longer in width which feels less weird!  Having the two frames in use means I can work multiple projects and not have to swap projects on and off the q-snap as much :D  Yay! This was also timed well because now the stitching won't end up with indentation marks from th...

The Framing of Umbrella Sky Part 2

Image
I won't write "a novel" for part 2... I'll just cut straight to the reveal and bombard you all with photos! Here she is finally framed: This one I took with the camera flash turned on: Different angle: I choose a silver coloured frame because it was much more complementary than the darker frames I was initially looking at. I felt like I wanted some metallic element in there from the start. Blacks were just too dark and wood didn’t look right. I think the lighter color really brings her out and that’s where the attention should rightly go! Frame moulding up close:   I went with the conservation clear glass (cuts out UV) to hopefully prevent any potential fading from exposure to light. Unfortunately this shot ended up a bit blurry it gives an idea of the size anyway! I am quite tall for the record!: I think it turned out well after the long process to get to this point.  Now, back to stitching my wips!